Long exposure shots are becoming more and more popular. The silky texture of water, light trails from cars at night, or blurred clouds in the sky add a fascinating touch to an image, making them look almost magical.
However, there is much more technique than magic involved, and there is no rocket science to it – though a few pieces of equipment are quite essential.
Here are a few tips for long exposure photography:
1. Find an appropriate subject
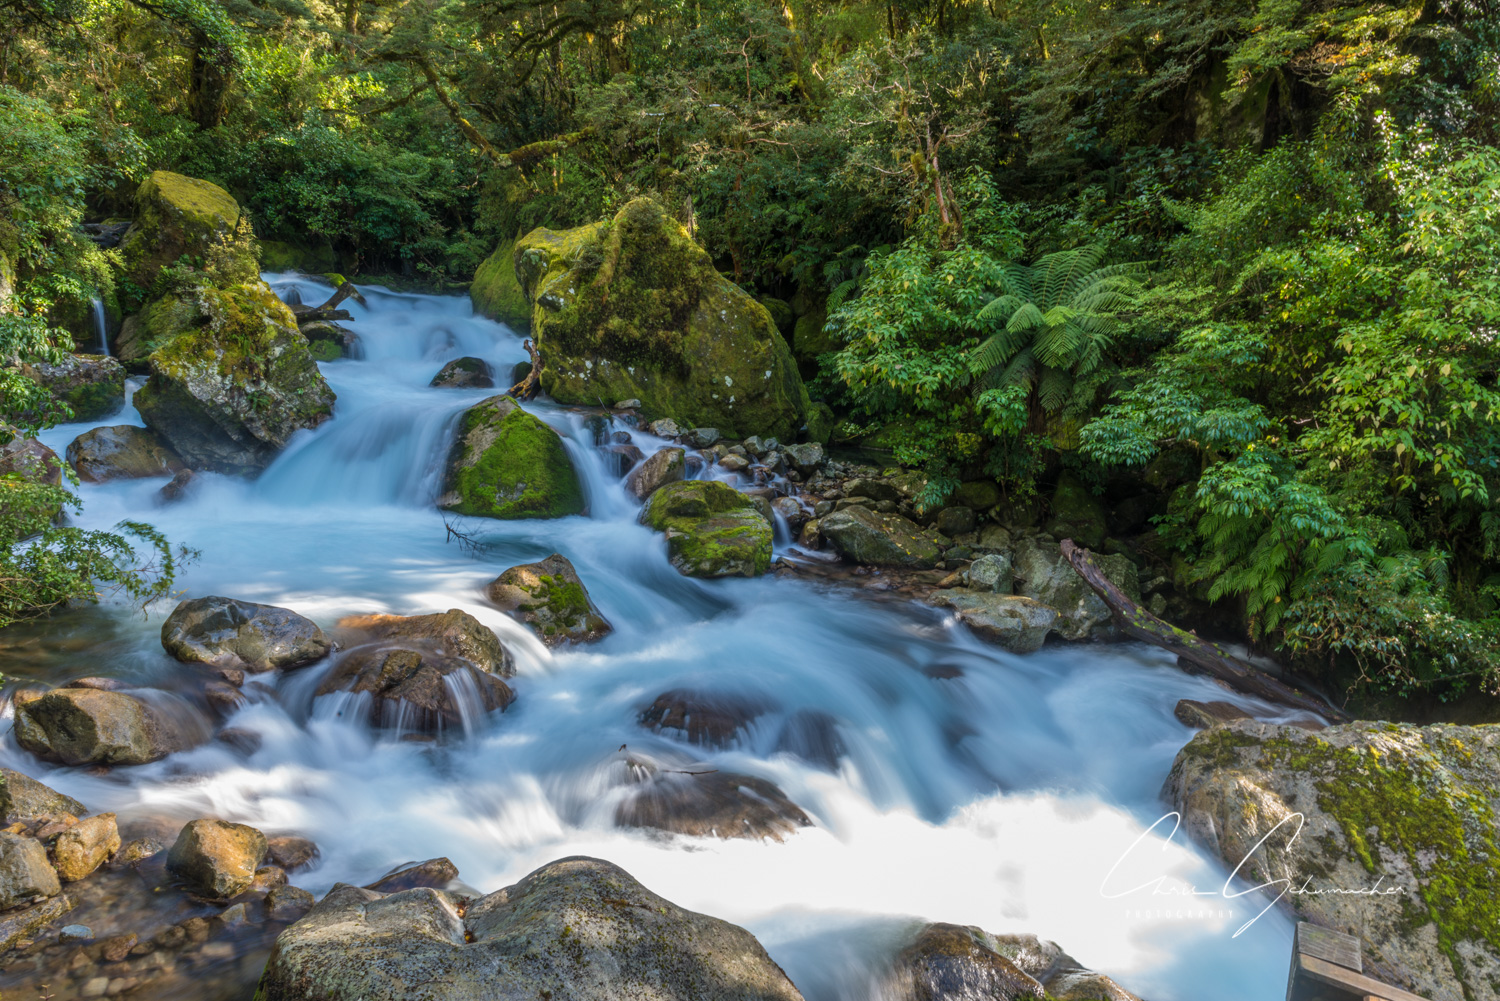
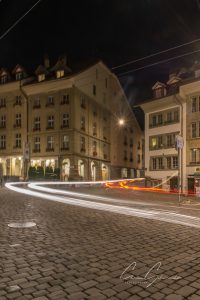
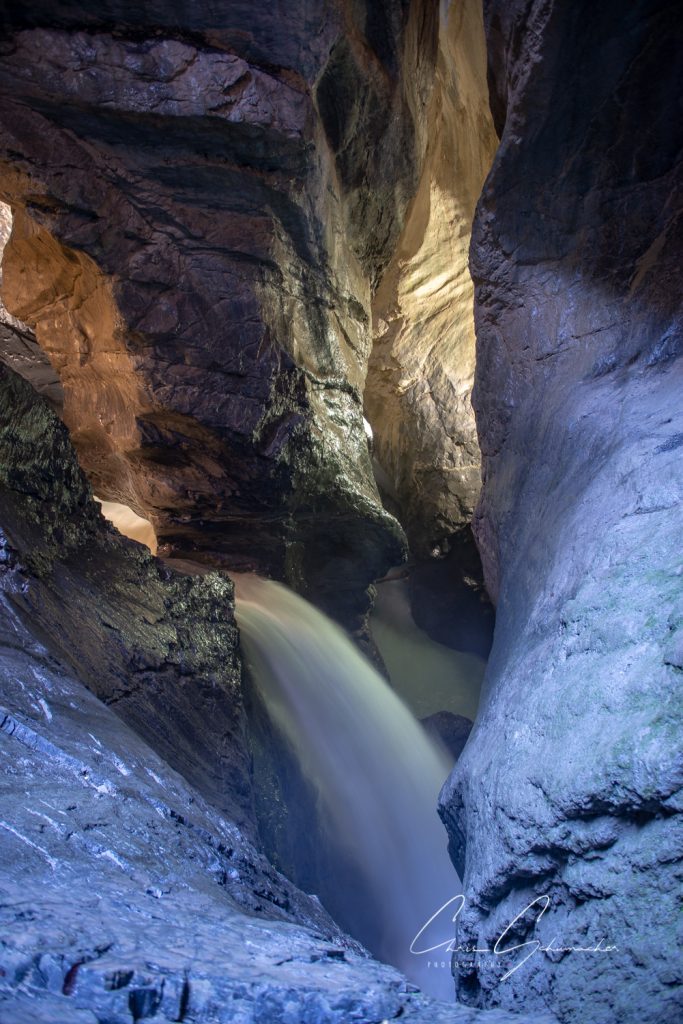 Not all subjects or situation lend themselves to long exposure photography. Obviously there has to be some moving object in your composition, otherwise the whole idea of the long exposure is rather pointless. A mountain looks the same if taken with a shutter speed of 1/200 or 5 seconds, with the appropriate light conditions. Most long exposure shots are either of some body of water, waves at the beach or a waterfall; some moving lights like cars at night, or with moving clouds in the sky. But you can also achieve great effects with people moving about, star trails or light painting with a torch or steel wool.
2. Study the weather
Rain can ruin your shot, but rainy weather can make for some great cloud shots. Blue skies are rather boring though, and even of you want to shoot waves at the beach, clouds can make the shot much more dramatic. However, long exposure photography takes some preparation and time during the shoot itself, and you don’t want to be surprised by an incoming storm when you’ve just set up your gear. So make sure you check your local meteorological sites, and keep an eye on the rain radar too.

3. Use a tripod
This one seems obvious, and yet often you can see people trying to take long exposure shots by hand. This just doesn’t work, it is abslutely essential that your camera is completely still during the shot – otherwise parts of your image will be blurred that you don’t want blurred.
Sometimes you can rest your camera on a rock, a railing or a tree. I’ve done this myself, but it never really works as well as a good tripod. Depending on the weather, it is a good idea to hang your camera bag from the middle of the tripod as ballast, especially if conditions are windy. In this case it is also very helpful to take the strap off your camera, or at least tuck it into the tripod so it doesn’t swing in the wind.
4. Use a remote control
Pressing the shutter will introduce vibrations, and you want to avoid this. There is no need for a wireless remote, but a simple cable release will do the trick. Of course if you want to do more long exposure photography, there are remote controls with timers, but normally you can do with a normal remote.
5. Lock the focus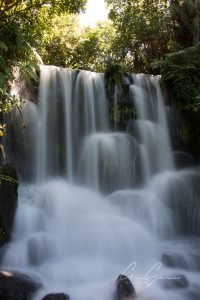
Once you’ve set up your gear, compose and focus your image, and then lock the autofocus. If you use manual, then focus and leave it. If you’re using the autofocus, focus your image by half-pressing your shutter, and then while still holding the shutter switch your camera to manual focus. This should keep the focus for your shot.
6. Take a test shot
Once you’ve composed your image and set the focus, it’s a good idea to take a test shot – at least if you’re taking a long exposure shot during daytime. At night, you can’t take a test shot without long shutter speeds.
Set your camera to aperture priority or manual mode, and set a good aperture, just as you would for a normal shot. Then take a test shot and look at it on your camera. If you get no washed out areas, and the histogram looks alright, then you’re ready.
7. Use ND filters
 During the day you won’t be able to use properly long shutter speeds without overexposing your image, even with the lowest ISO possible and the smallest aperture. Hence you need a way to limit the amount of light that enters your camera – basically pretend it’s night. To do this you use a neutral density filter. This is a filter which reduces the light that goes into your lens, without changing the colour or hue of the resulting image. Each stop of an ND filter reduces the light by a factor 2. An ND4 (4-stop) filter would reduce the light by 4, an ND8 (8-stop) filter by 8, and so on. If the light is reduced by a factor 8, this means the shutter needs to be open 8 times longer with the same aperture and ISO than without the filter.
If you are in manual mode, you can now set your shutter speeds accordingly, and if you’re in aperture priority, you can let the camera do the work. If you want to calculate your shutter speeds using the speed of your test shot and the filter, there are countless apps and websites which will calculate the shutter speed for you.
8. Taking the shot
When you’re finally ready to take your shot, step back from the camera and use your remote to trigger the shutter. Now it’s essential to prevent any vibrations to the camera, and I’ve had more than one shot ruined because I moved the ground which moved the tripod. Once the shot is done, check the image for any washed out areas, and have a look at the histogram. If the histogram is too far to one side, correct the shutter speed and repeat the shot.